Feminine ruffles and Vogue 9243
Back in September my mom was visiting, and we went fabric shopping. During our trip I picked up some beautiful solid green silk georgette. I had a vision of a fitted feminine top with ruffles and floaty sleeves. Vogue 9243 was close to what I had in mind.


I made up a muslin in some similar silk fabric from my stash. I'm glad I did, because there were a few details I didn't care for and altered accordingly.


I cut view B, but decided to make the sleeves short to save fabric, but also because long flouncy sleeves would drive me crazy. To make the ruffles, I cut 1.75 inch bias strips and finished them on one side. I added these to the front princess seams and neck edge. I also used some bias tape to bind the neck edge. Here is a link to how I make my own bias tape.


The ruffles were experimental, and although I do like them, it is not exactly the look I was imagining. I was generally satisfied with the pattern, but did not like the back zipper. It curls up when I sit down and somewhat distorts the back silhouette. I am able to slip the top over my head with only unzipping the zipper a couple inches, so I eliminated it from my final pattern and cut the back piece on a center fold. I added a bias bound slit at the center back with a loop and button at the neck line.


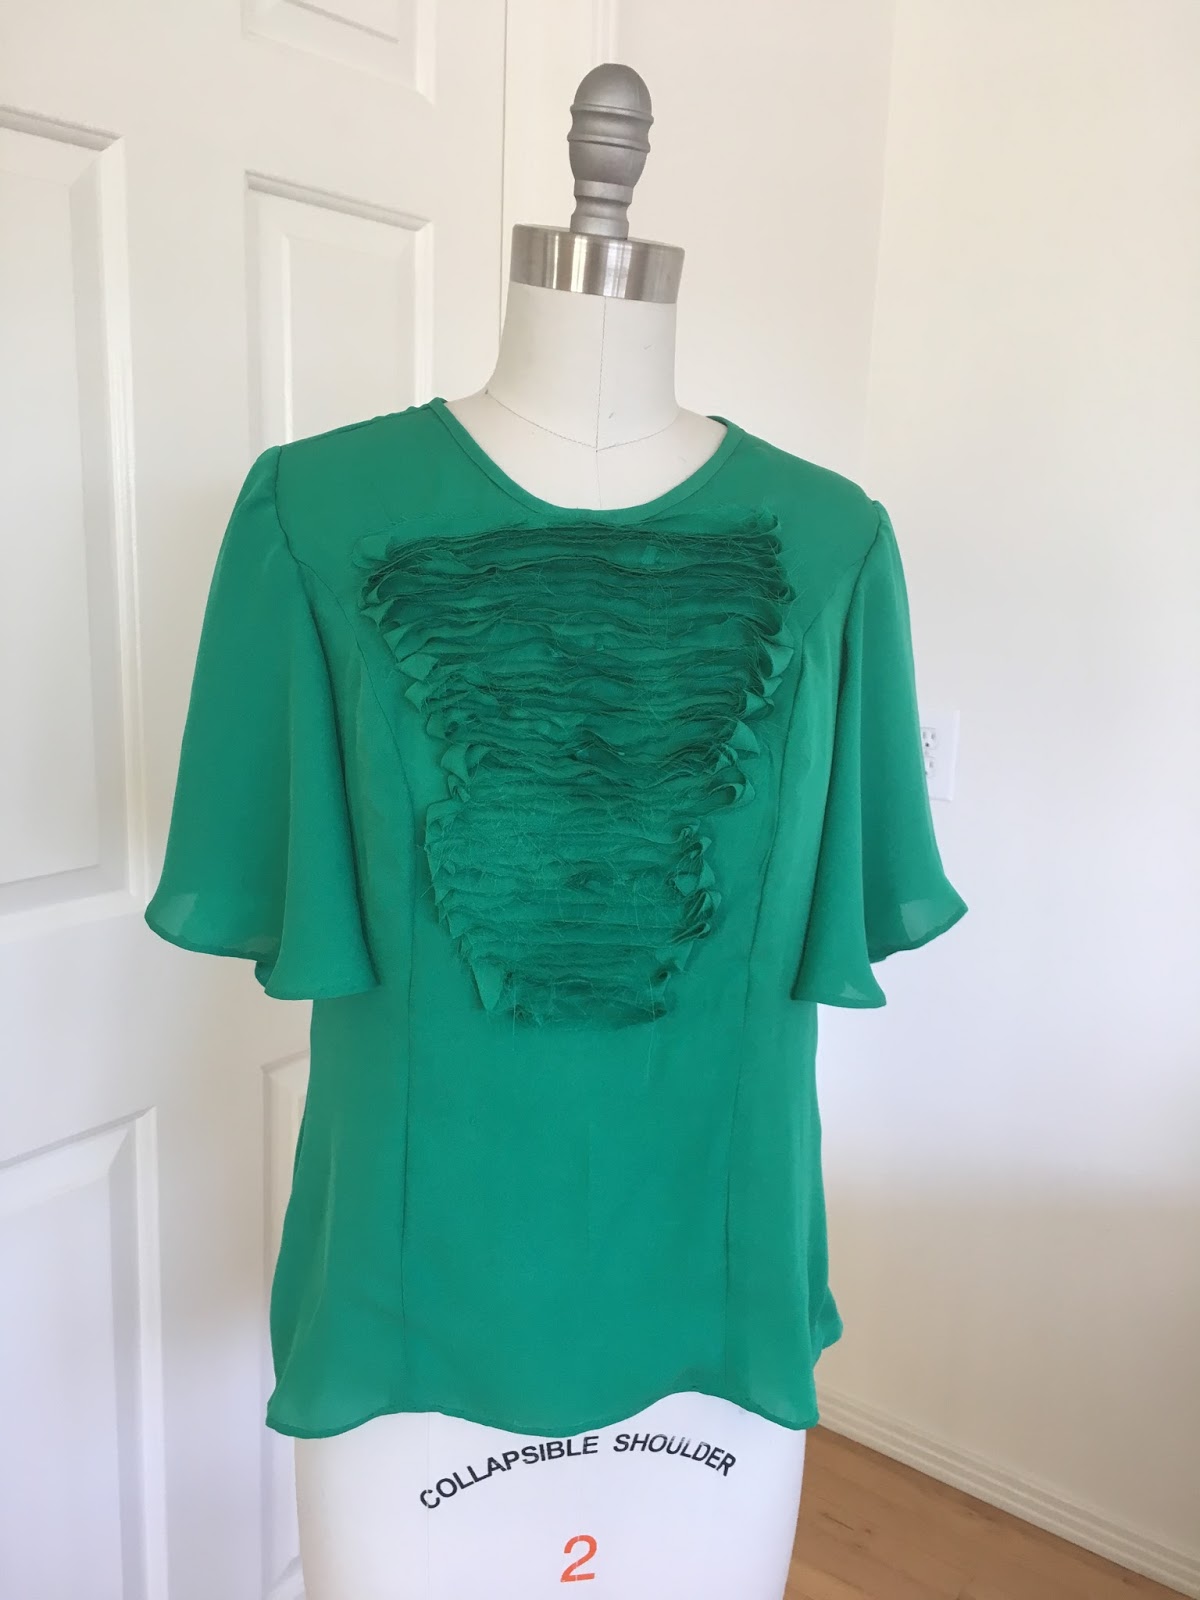
Instead of ruffles, I sewed strips of silk across the front to create texture. The strips were cut across the grain, not on the bias as in my previous version. This idea was inspired by an silk Ann Taylor blouse that I had in my closet:


I sewed the strips on the center front piece before assembling the blouse:


This technique was experimental. Although I tried to draw lines to guide my sewing, they were hard to see so the final result was not completely symmetrical. Also, about halfway through I realized reinforcing the fabric with some lightweight stabilizer to the wrong side of the fabric would have been a good idea. In the end, I was still pleased with the final result.

Finally, one last change I made to my final version of this top was in the hemming. In my first version I turned and stitched the sleeve hem by hand and the bottom hem with my sewing machine. This was okay, however, to get a floaty drape I did a hand rolled hem for both. (My first time trying this technique! I watched a few YouTube videos beforehand. ) I waxed my matching thread to help prevent unwanted knot formation and used my favorite hand sewing needles, japanese #9 T.E.C. Tokyo needles, pictured below. I also used a third hand sewing clamp to hold one end of the hem to keep some tension while I was working.


This turned out well for the sleeves but the bottom hem was difficult because of the extra bulk of the many seams (all those princess seams!). The final result was acceptable, but I will need to work on my hand rolled hem technique across seams.
Here is a link to my review at patternreview.com.
Thanks for reading!


Comments
Post a Comment